Skip to content
CPCole's Pro PaintingHouse painters, Tacoma and Pierce County Line open 24/7(253) 478-2745
Wood & Stain painting, Tacoma

Interior staining in Tacoma for fir trim, doors, beams and built-ins

Stained wood carries a room in a way paint cannot.

  • 24/7Phone answered
  • $4.65-$9.80Typical, per linear foot of trim
  • 66Areas we paint
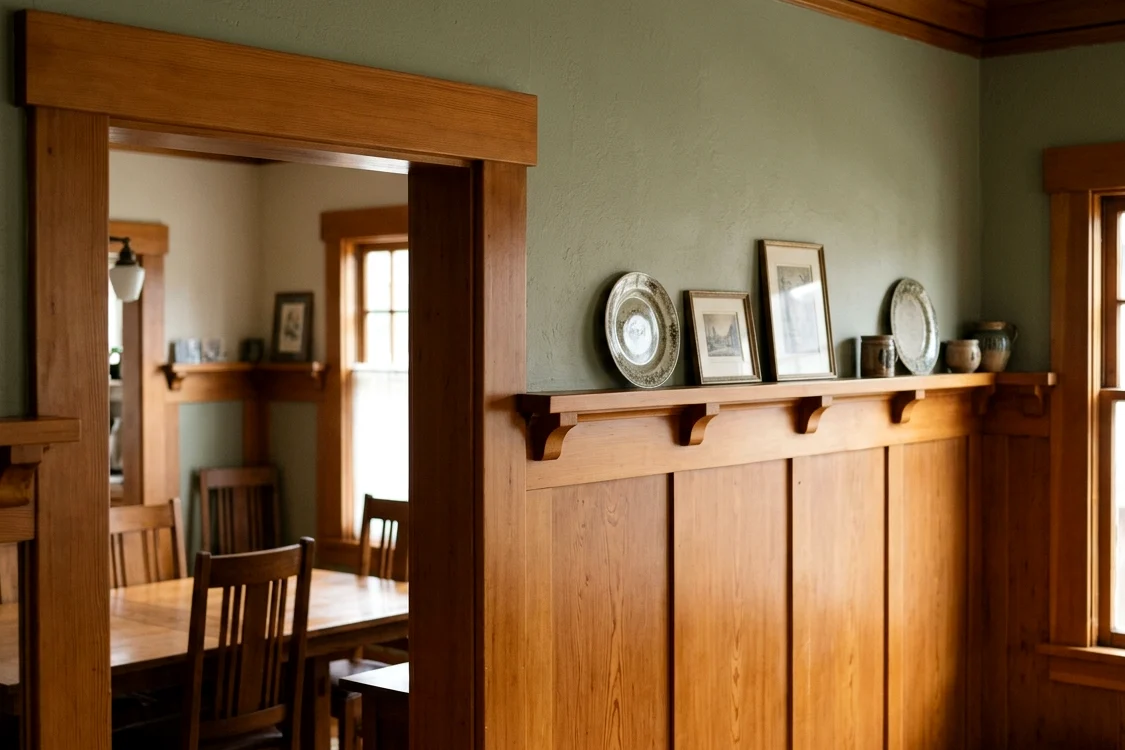
Freshly stained honey-toned fir door casings and plate rail glowing in soft gray window light inside a Proctor District Craftsman dining room
Quick answer

Interior staining covers wood that should show its grain: fir trim and doors, ceiling beams, built-ins, mantels and handrails. We sand, test the stain on your actual wood, apply it evenly and finish with two or three clear coats. In Tacoma, typical pricing runs $4.65-$9.80 per linear foot of trim or $218-$437 per door, typical figures confirmed once we see the wood.

Stained wood carries a room in a way paint cannot. Old-growth fir casings in a 1920s bungalow, cedar beams across a newer living room ceiling, a walnut-toned handrail that everyone grabs on the way upstairs: these are the details people notice first. They also wear in their own way. Clear coats go cloudy near windows, handrails turn gray where hands rest, and new wood next to old never quite matches without help. Staining is slower, more exacting work than painting, and we price and schedule it that way.

Most of our staining falls into three groups: new unfinished trim and doors in a build or remodel, reviving worn finish on original woodwork, and matching new pieces to old ones after a repair. Kitchen cabinetry with a clear finish is its own trade, covered on our cabinet refinishing page. Everything else made of wood that you want to keep looking like wood, from wainscot to window stools, fits here. Call (253) 478-2745 and we'll study the wood with you in daylight.
When to call

Signs it is time for interior staining

Blotchy stain on new pine or maple

Soft pine and tight-grained maple soak up stain unevenly, leaving dark patches unless the wood is conditioned first.

Handrails worn gray or tacky

Skin oils break down the clear coat on rails and newel caps, leaving the wood dull, dark or sticky to the touch.

Milky finish on window stools

Winter condensation on stools and lower casings turns old varnish cloudy white through the wet season.

A new casing that stands out

A replaced casing or added door is easy to spot when fresh wood takes stain differently from century-old fir.

Orange tones that date the room

Many oil varnishes amber with age and push oak and fir toward orange. A new stain and clear coat can shift that tone.

Raw beams or built-ins

Unfinished wood absorbs moisture and grime, so new beams, shelving and benches need stain and a sealer before daily use.

Why is Douglas fir trim so tricky to stain evenly?

Douglas fir is the wood in most older Tacoma trim and in many new custom homes, and it is one of the hardest to stain well. Fir has hard, dark latewood bands next to soft, pale earlywood. A penetrating stain soaks into the soft bands and skips the hard ones, so the grain can turn harsh and stripy, almost like a zebra pattern. Flat-sawn fir shows this most, while the vertical-grain fir found in older homes stays calmer. Sanding too fine makes it worse, because the hard bands polish closed.

We handle fir by sanding to a moderate grit, applying a wood conditioner or a thin washcoat of sealer, and choosing a stain that sits near the surface rather than diving deep, often a gel stain. On pine, alder and maple, which blotch instead of stripe, the same approach evens out the tone. We test on a cutoff or a hidden spot first, let you see it dry beside the wall color, and only then start on the trim. Fir will always show some figure, and in an older house that is part of its appeal.

How we match new stained wood to century-old woodwork

Original stained trim in a North Tacoma or Proctor District home has had a century to darken. The wood itself has aged under daylight, and the old shellac or varnish on top has ambered. So when a section of casing is replaced, or a new door goes into an old opening, a stain straight from the can rarely matches. We build the color in layers: a base stain close to the old wood, then a toner or glaze to warm or deepen it, then a clear coat with a touch of amber if the original finish carries one.

We compare samples against the old wood in the same room and at more than one time of day, because a match under a lamp at night can look off in flat gray afternoon light. It often takes three or four test boards to get there. If the old finish is shellac, we may topcoat the new piece with shellac too, since it gives the same warm glow. The aim is that a guest cannot pick out which casing is new. Where a repair piece has to be milled to profile first, we line that up before staining starts.

Where does a stained finish wear out first, and how do we protect it?

Wear on stained woodwork follows hands and water. Handrails and newel caps lose finish where palms slide, and skin oils soften older varnish until it feels tacky. Window stools take condensation every winter morning, so the finish clouds and the wood beneath can gray. Door edges near the knob darken from handling. These spots get a harder topcoat, usually a waterborne urethane or an oil-modified polyurethane, with an extra coat on the rail top and the stool. Satin is our usual sheen because it hides fine scratches and fingerprints.

Ceiling beams and built-ins see far less wear, so the finish there is about looks and sealing the wood against dust and indoor humidity. A matte clear coat keeps beams from shining under recessed lights. For refreshes, we often skip stripping entirely: the old finish gets a thorough cleaning to remove wax and grime, a light scuff, touch-up stain on worn spots and a fresh clear coat. On stairs with painted balusters and a stained rail, our staircase painting work handles the painted parts in the same visit.

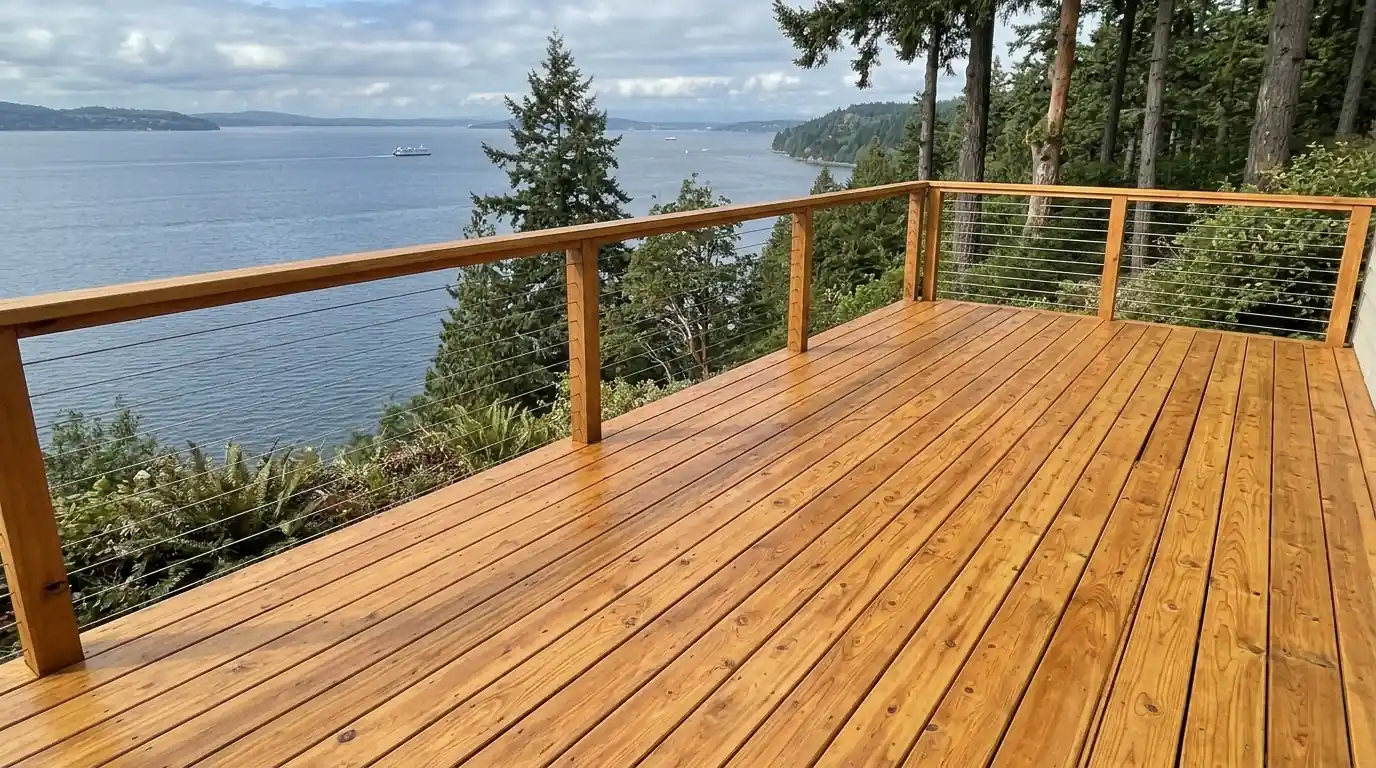
Cedar deck freshly stained in a semi-transparent honey tone overlooking Puget Sound near Tacoma
Prep sets the finish: most of a paint day goes into the work before color goes on.
What is included

What our interior staining covers

  • Sanding new wood smooth, with a wood conditioner where needed
  • Stain samples on your actual wood, judged in your room's light
  • Gel stain or toner on blotch-prone woods such as maple and pine
  • Cleaning and scuffing sound old finish before it is recoated
  • Wood filler tinted to match, set after the stain coat
  • Two or three clear coats with fine sanding between each one
  • Masking of walls, floors and hardware, or removal where practical
  • Waterborne or oil-modified clear finishes chosen piece by piece
Job days

How a interior staining job runs

Typical order of work on a Tacoma-area project. Weather can shift exterior days.

  1. D1

    Study the wood in daylight

    We look at the species, the existing finish and how worn it is, and we check the moisture of any new wood. Then we talk through color goals and give you a written price.

  2. D2

    Protect the room

    Floors, walls and nearby surfaces get covered and masked, and hardware comes off doors and built-ins. We set up fans for airflow, which matters most in winter when windows stay shut.

  3. D3

    Prep the surface

    New wood gets sanded and conditioned, while old finish is cleaned and scuffed or stripped where needed. Nail holes wait until later so filler does not show through the stain.

  4. D4

    Sample and approve

    We stain test pieces of matching wood and let you look at them dry, in your room's own light. Work on the real trim starts only after you approve a sample.

  5. D5

    Stain and fill

    Stain goes on in manageable sections and is wiped back to an even tone. Tinted filler goes into nail holes after the stain so it blends in.

  6. D6

    Clear coat and inspect

    Two or three clear coats follow, with light sanding between each for a smooth feel. We check every piece with a raking light and fix any runs or dry spots before we finish.

Cost

What moves the price of interior staining

Typical range $4.65-$9.80 per linear foot of trim. These are the things that push a job toward either end.

  1. Wood species, since fir, pine and maple need extra steps to stain evenly.
  2. New, unfinished wood versus old finish that must be cleaned or stripped.
  3. Profile depth on casings, crown, plate rail and paneled doors.
  4. Color matching to existing woodwork, which can take several test boards.
  5. Number of clear coats and the sanding needed between them.
  6. Ceiling height and access for beams, tall built-ins and stairwell rails.
Local

Interior Staining around Tacoma and Pierce County

Tacoma has a lot of stained wood worth caring for. Craftsman bungalows across North Tacoma and the Proctor District often keep their original fir casings, plate rail and built-in buffets, some under old shellac that has crazed or darkened. Newer custom homes in Gig Harbor lean toward stained fir or hemlock doors, knotty alder and cedar beams that need a finish suited to big windows and low winter light. Our damp winters push indoor humidity up, so wood near windows and exterior doors swells a little each season and the finish there wears first. That is where we spend the most time on any staining job.

Where we do the most interior staining

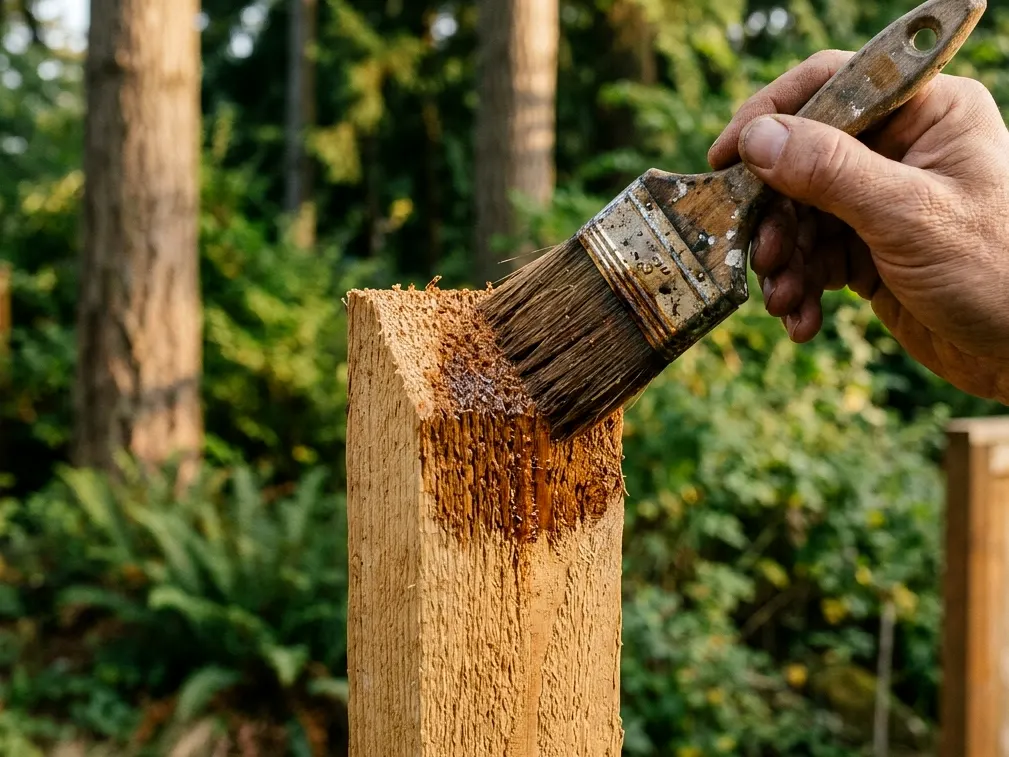
Stain brush working into the end grain of a cedar fence board in a Pierce County backyard
FAQ

Interior Staining questions from Tacoma homeowners

Can you strip paint off original fir trim and stain it again?

Yes, though stripping fir is slow work. Paint sinks into open grain, so getting fir back to a stainable surface takes chemical stripping, careful scraping and sanding, often with the trim still on the wall. In homes built before 1978, those layers may contain lead, so we use lead-safe methods throughout. Sometimes milling new fir and staining it to match costs less, and we'll lay out both options.

Can new stain go over wood that already has a clear finish?

Within limits. A gel stain or tinted toner can go over a cleaned, scuffed clear finish to make the wood darker or warmer, and a fresh clear coat seals it in. It cannot make the wood lighter, because a lighter color has to soak into bare wood. If you want a lighter tone, or the old finish is crazed and peeling, stripping back to bare wood is the way forward.

How do I keep a stained handrail from getting sticky again?

Stickiness comes from skin oils and lotions softening an older finish. Once the rail is recoated with a hard waterborne or oil-modified urethane, it resists that much better. Wipe the rail with a damp cloth and a drop of mild dish soap every few weeks, then dry it. Skip furniture polish and oil soaps, which leave a film that attracts grime and makes the next recoat harder.

What stain colors suit fir trim in a Craftsman home?

Most Craftsman interiors look right in warm, medium tones: honey, amber, light brown and the reddish brown that fir takes on as it ages. Very dark espresso stains can hide fir's figure, and gray or whitewashed tones rarely suit the style. We test two or three samples on your trim or a matching scrap so you can see them next to your wall color and floor before deciding.

Can you stain ceiling beams that are already installed?

Yes. We mask the ceiling, walls and any light fixtures around each beam, then sand or clean the wood based on its condition. Rough-sawn beams take stain by brush and rag, while smooth beams can be sprayed if the room is empty and fully masked. Working overhead takes scaffolding or tall ladders, so beams in a two-story great room cost more than beams over a standard ceiling.

Talk to us about interior staining

Call and tell us what you are painting. We answer 24/7 and set up a walk-through at a time that suits you.

Answered 24/7(253) 478-2745